
Velvet
User Guide
Set up Linux on your Mac, use the desktop and terminal, and run commands and tests with a coding agent.
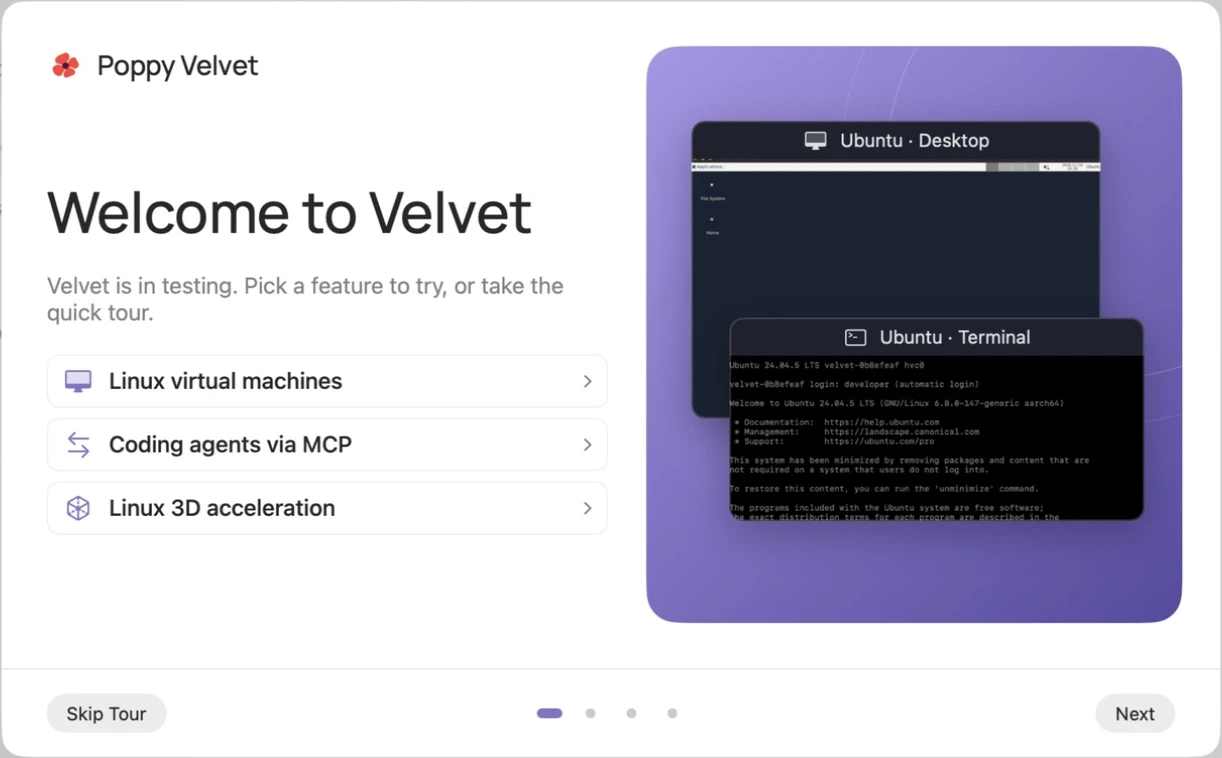
Velvet runs on Apple silicon Macs with macOS 27 or later. Use an ARM64 (aarch64) Linux installer or disk image. Start with Ubuntu Desktop for a graphical Linux session or Ubuntu Server for a terminal-focused environment.
Create or import a VM
Use New VM in the library to install Linux, copy a disk image, or create a blank machine.
Install Linux from an ISO
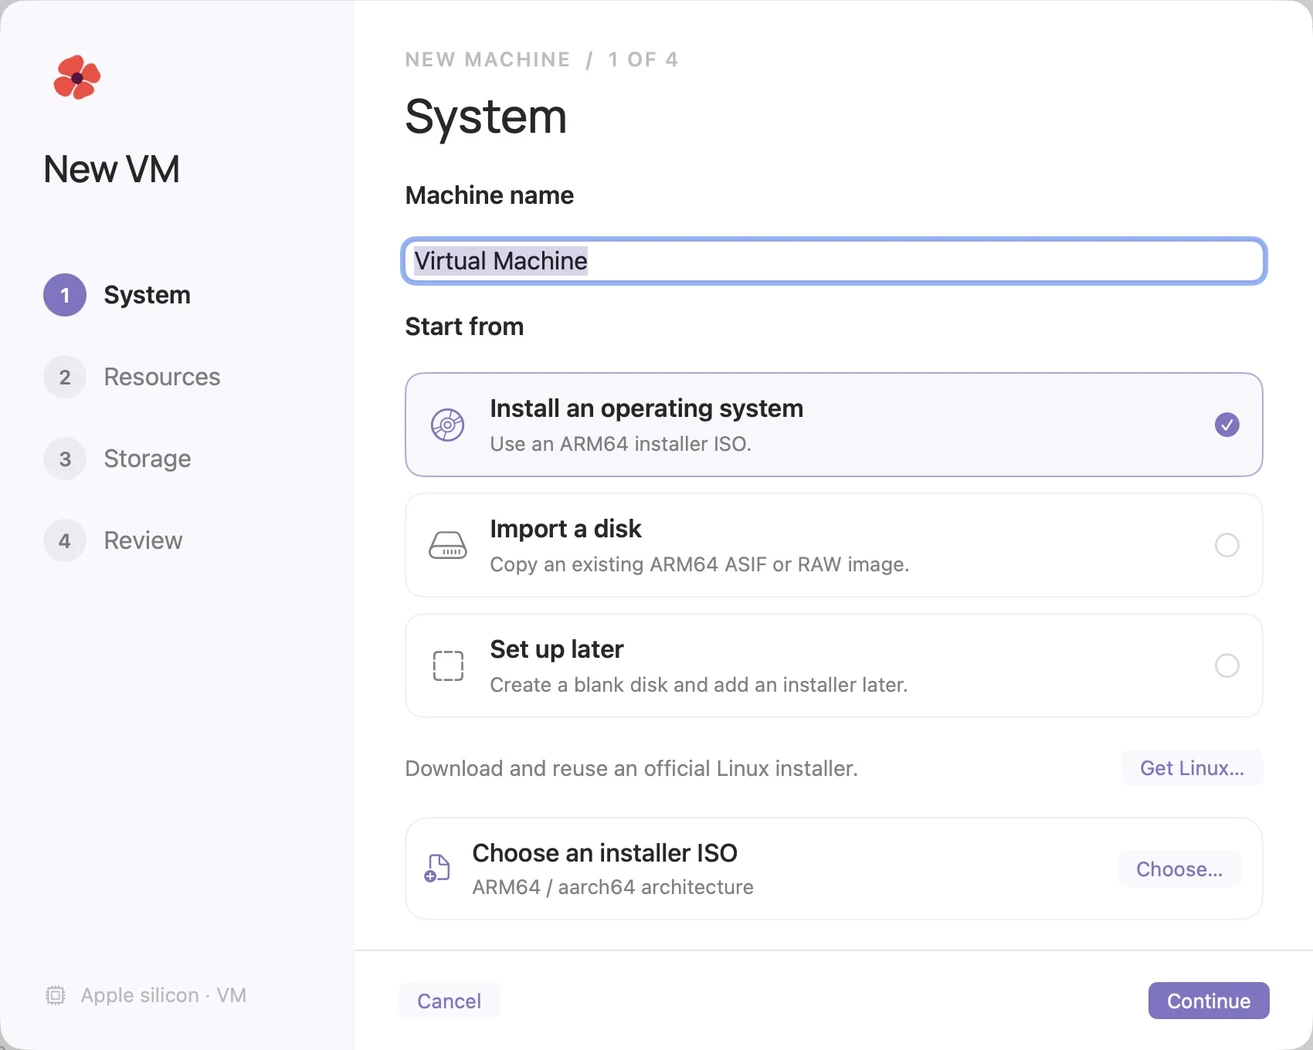
- Enter a name and choose Install an operating system.
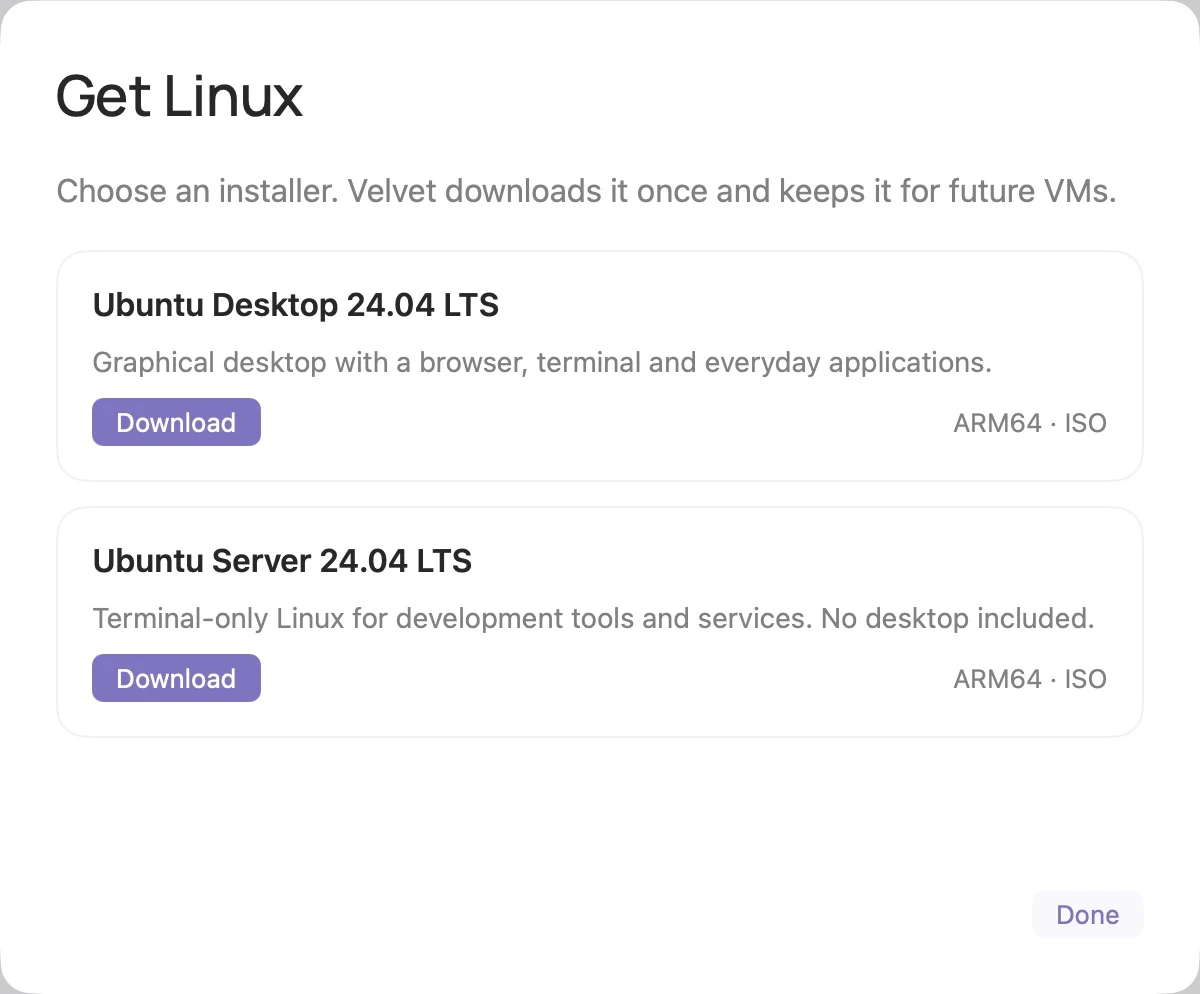
- Pick your ARM64 ISO with Choose…, or select Get Linux… to download Ubuntu. Velvet verifies vendor downloads and reuses completed installers for future VMs.
- Continue through Resources, Storage, and Review. Select Create machine.
- Select Boot installer and finish installing inside Linux. Create your own Linux user during the installation. Shut down and eject the ISO before booting the installed system.
Use an existing disk or machine
- Import a disk copies an ARM64
.asifor RAW disk into a new VM. A bootable disk needs its own bootloader and installed system. Convert other formats, such as QCOW2, to a supported disk format before importing. - Open Virtual Machine… adds a Velvet VM folder to the library in place. Use it when the VM already has a Velvet configuration and disk.
- Set up later creates a blank disk. Attach the ISO from the machine’s Installation media section when you’re ready.
Templates and Linux login
Open Templates for ready-to-provision environments such as Ubuntu, Ubuntu Desktop, Python, Node.js, and Rust. Select a published template and version, then choose Create VM. Velvet downloads or reuses its verified base, boots a new independent VM, and installs Poppy Tools.
- Choose resources, a storage location, and an optional project in the creation dialog.
- Watch Activity for first-boot setup. Template ready means setup completed. Cached means the base image is available locally.
- Open the VM window when it’s ready. For supported templates, the creation dialog, machine page, and Settings → System explain how to sign in.
Ubuntu template account
The desktop or terminal signs in automatically as developer after setup. The account has no login password and direct root login is disabled. Use sudo <command> for one administrative command or sudo -i in the VM terminal for a root shell. Both use passwordless sudo. For manual installs and imported disks, use the account configured inside that VM.
If the catalog shows Image not published, import a signed Velvet template package with Import Templates… or use Get Linux to install from an ISO.
Run and use the console
Choose Run machine to boot, or Show window to return to a running VM. Closing the VM window leaves Linux running. Use Shut down and wait for the stopped state before changing hardware settings.
Find startup output
- VM Display shows the graphical console, including the installer and boot output sent to the display.
- Window → Show Terminal opens the serial terminal. A terminal-oriented template can switch there when Linux starts sending serial output. Use Show VM Display to switch back.
- In an accelerated VM, Window → Show Boot Output reopens the serial boot view. Choose Open Console Log in the library’s machine menu for the retained serial log.
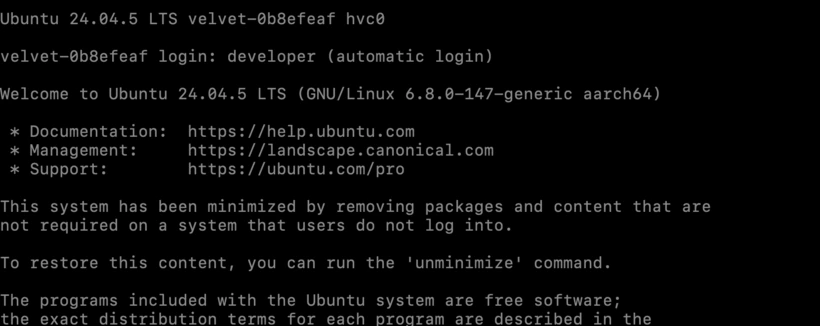
Serial text depends on what the guest sends. If an imported Linux image shows a blank Terminal, switch to VM Display. To adjust serial text size, use the VM window’s Window menu. If Linux cannot shut down cleanly, Force Stop… in the machine menu cuts power and can interrupt writes.
VM settings and storage
Shut down a VM, choose Settings, then use Continue to reach the relevant step. Finish with Save changes on Review. The changes apply at the next start.
| Step | What you can change |
|---|---|
| System | Name and installation media. |
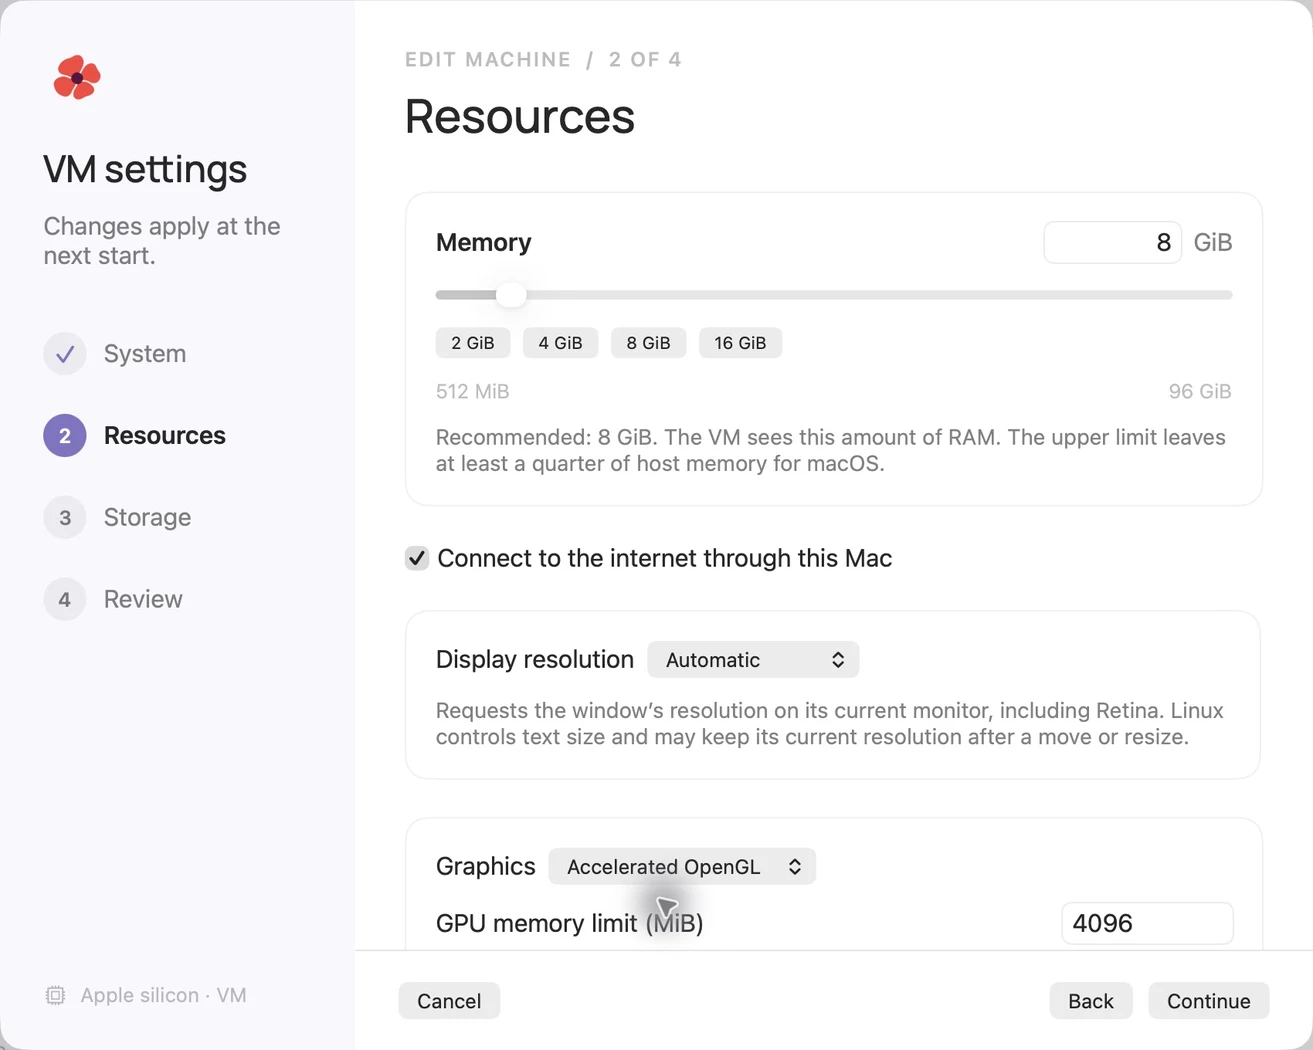
| Resources | Virtual CPUs, guest memory, shared networking, display resolution, and graphics. |
| Storage | Folder location and disk expansion. After increasing virtual capacity, extend the partition or filesystem in Linux if the guest requires it. |
| Review | Confirm the resulting configuration and save it. |
Display resolution can be Automatic, Match Window, or a fixed size. Match Window requests the Mac window’s pixel size, including Retina. Linux can keep its current mode until you select the new resolution in the guest. The networking switch uses a shared connection through your Mac.
On the machine page, Disk capacity is what Linux can use. Allocated on this Mac shows the disk’s allocated blocks. A growable ASIF disk consumes more host space as Linux writes data. Use Reveal in Finder to locate the VM folder. From Remove…, choose Remove from Library to keep its files, or Move to Trash for a stopped VM you intend to delete.
Linux 3D acceleration
Test hardware-accelerated OpenGL in an Ubuntu desktop VM.
- Start the VM with Standard graphics. Install and pair Poppy Tools so the accelerated window can deliver mouse and keyboard input.
- Shut down the VM. Open Settings → Resources and change Graphics to Accelerated OpenGL.
- Review the GPU memory limit and select Save changes. Start the VM and open its desktop.
- In Linux, run
glxinfo -Bwith Mesa utilities installed. Look for direct rendering and avirglrenderer. Run a Linux OpenGL app in the desktop to try acceleration.
Use Advanced graphics to choose the renderer placement. Isolated is the default and runs the renderer in a separate process. If the desktop or input is unavailable, switch the stopped VM back to Standard and check Poppy Tools.
Install Poppy Tools
Tools connects Linux to Velvet for supervised commands and accelerated-window input. A ready Ubuntu template VM already has Tools. For a manually installed or imported Linux VM, pair it from its machine page.
- Shut down the VM, then select Poppy Tools → Set up Poppy Tools….
- Choose Prepare installation disk. Start the VM and sign in to Linux.
- Copy the command from the setup sheet and run it inside the guest as root. Use your Linux account’s usual method for obtaining administrative access.
- Return to the library and look for Connected in Poppy Tools. The service reconnects automatically after boot. Reconnect retries an existing pairing.
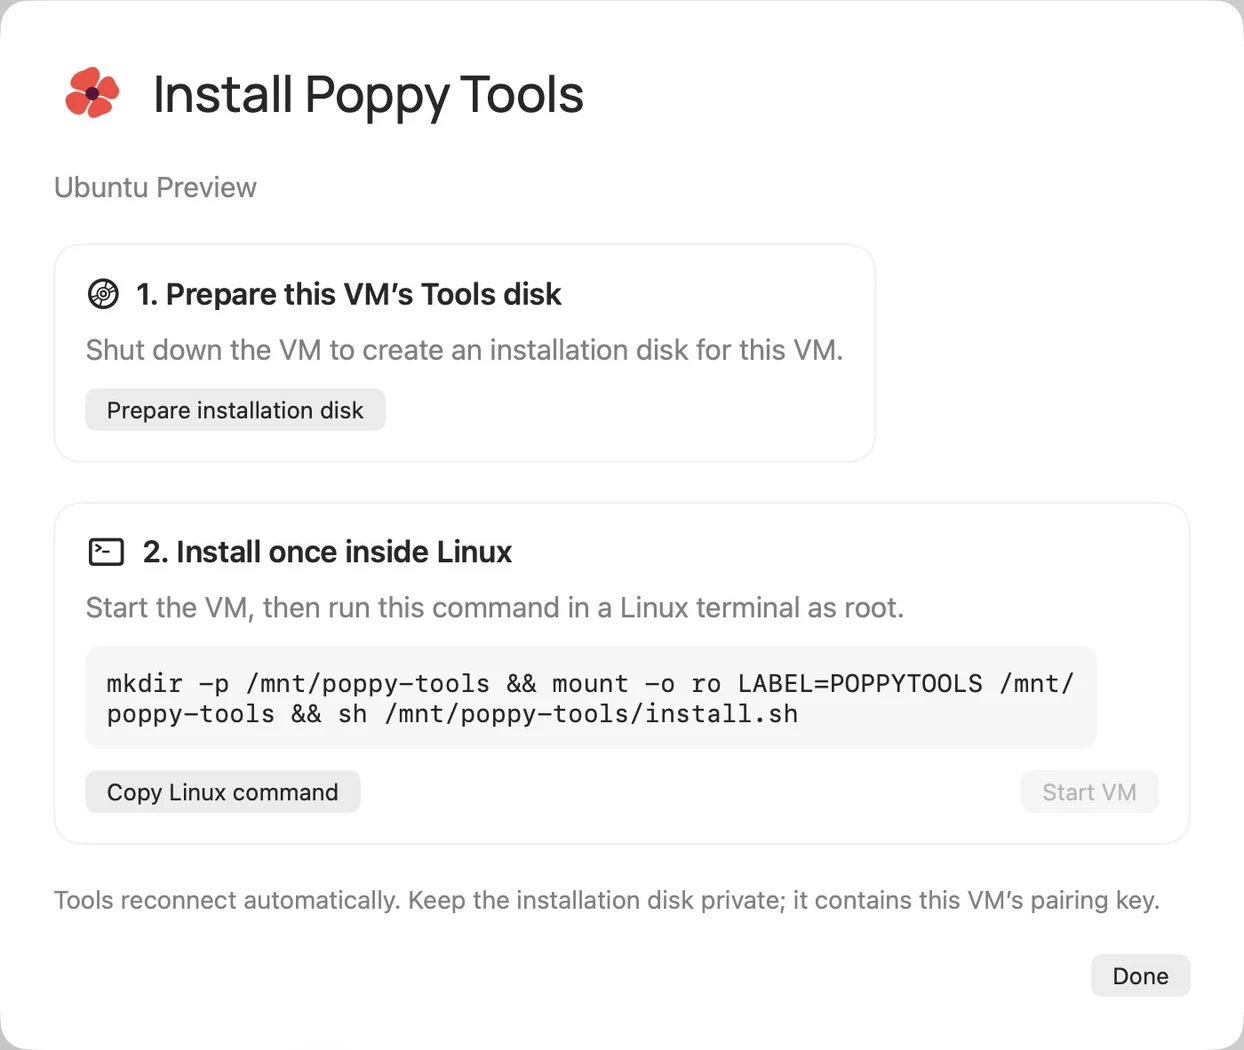
The installation disk contains this VM’s pairing key. Keep it private. Use Forget connection… on a stopped VM to revoke the pairing. To reconnect a VM whose Tools are outdated, follow Installation help… to pair and install the current Tools.
Run commands from Velvet
On a running VM with Tools connected, select Run command…. Pick a Linux account, enter an existing absolute guest working directory, and choose the time limit. Allow commands grants the selected account command access for four hours. Commands use that account’s Linux permissions and configured privileges.
For a first check, enter uname -r with / as the working directory. Every run starts a fresh, noninteractive shell. Use the VM terminal for commands that need input, a login shell, or an interactive program.
Open the machine’s Commands panel to see task state and switch between Standard output and Errors. Review the exit code and use Save output… to keep the retained output. History remains available with the VM shut down. Stop requests can interrupt running work. They cannot undo writes that already happened.
Connect coding agents through MCP
Use a local MCP connection to let Codex, Claude Code, or another client discover VMs and run work in Linux.
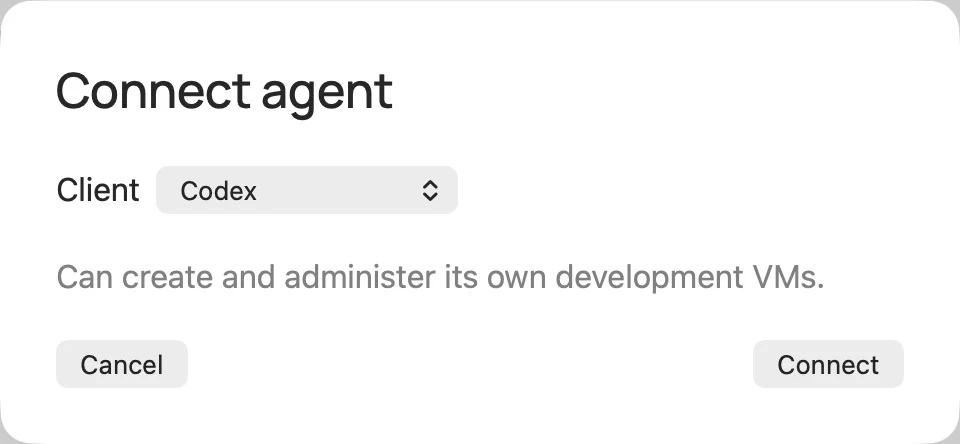
- Select Automation → Connect agent and choose your client.
- Choose Copy setup message, then paste it into that agent and send it. The message registers the protected local connection and supplies the Velvet skill.
- Ask the agent to list my Velvet VMs to verify access in that chat. If the MCP client needs a restart or reconnect, do that and repeat the read-only check.
- To reuse a VM, install Tools and choose Add existing VM… from the connection details. Select the intended account and Allow access. Adding a VM grants only that selected VM and Linux account.
Try an agent request
“Run uname -r in my Ubuntu VM and show the kernel version.” For a build or test request, tell the agent which VM and which Linux workspace to use. Make sure the source is already inside Linux.
Setup verified records successful contact. To check a particular chat, run the list request there. Use the connection’s Settings to manage its resource and storage limits. Remove access revokes one VM grant. Remove connection revokes the client and schedules cleanup of its temporary VMs.
The local MCP tools cover template provisioning, VM lifecycle, project metadata, and batch execution. Use the native VM window for interactive terminal and desktop work. The local setup authenticates through Velvet’s protected configuration, with no Linux password or SSH setup required.
Projects and temporary VMs
Use Projects → New Project to name a workflow and record an absolute Linux workspace path. Bind an existing VM from the project page, or choose the project when creating a template VM. The binding records a path inside Linux. Create the directory and put your source there separately.
Choose Temporary when a template VM is disposable. A temporary VM normally expires after one hour, including setup and time spent shut down. Extend 1 Hour adds time within the connection’s limits. Keep makes it persistent. Save work you want to keep before using Release…, which deletes the managed VM after safe shutdown.
Command line and MCP tools
Run the bundled CLI
In macOS Terminal, use the executable from the installed Dev app. Adjust the path if you keep the app outside Applications. Choose external VM folders in Velvet first so the sandbox can restore its saved access.
velvet="/Applications/Poppy Velvet Dev.app/Contents/MacOS/velvet-dev-library"
"$velvet" --cli --help
"$velvet" --cli status "/path/to/Ubuntu.virtio"
"$velvet" --cli start "/path/to/Ubuntu.virtio" --window
"$velvet" --cli console "/path/to/Ubuntu.virtio"
"$velvet" --cli shutdown "/path/to/Ubuntu.virtio"
Use Ctrl+] to detach from the CLI console. The CLI help also lists disk and display configuration, Tools setup, task output, and diagnostics. Guest paths passed to exec --cwd must already exist inside Linux.
MCP workflow for agents
| Goal | Tools and results |
|---|---|
| Find resources | machines.list, machines.get, storage.list, and templates.list. Follow nextCursor with unchanged filters. Copy exact IDs and versions. |
| Create a VM | machines.create returns an operation. Wait for succeeded before using its machineID, Linux principal, and workspace. templates.get returns interactive login guidance when available. |
| Run a command | execution.start uses a guest directory. Read stdout and stderr with independent offsets via operations.read_output. Drain both streams after completion and check the exit code. |
| Recover accepted work | Use operations.list, operations.get, or operations.wait. Retry an uncertain request with the original key and identical arguments. |
The tools and limits exposed by each MCP connection appear in its live discovery. Use the bundled Velvet skill for detailed examples and operation recovery.
Troubleshooting
- The VM returns to its installer.
- Shut down, eject the ISO from Installation media, then boot the system disk.
- The terminal has no boot messages.
- Switch to VM Display to see the graphical console. Check Open Console Log for serial output the guest has emitted.
- The accelerated desktop shows Input needs Poppy Tools.
- Check the Tools connection. If you need working input to install Tools, switch the stopped VM back to Standard, install and pair Tools, then re-enable acceleration.
- A VM folder is unavailable.
- Reconnect its drive and choose Open Virtual Machine… to select its folder and restore access.
- The agent can’t see a VM.
- Check that MCP lists VMs in that chat, the connection still grants that VM, its Tools are connected, and the intended Linux account is selected.
- The VM failed to start or shut down.
- Open View diagnostics… from the machine. For a reproducible launch problem, use Run with diagnostics, then Export diagnostics… to save a report.